Reflective products are among the most demanding subjects in commercial photography. Watches, jewellery, polished metal, glass bottles, glossy cosmetics, screens and lacquered packaging do not simply show their own colour and shape. They also reproduce the studio around them. A small change in the position of a light, camera, flag or crew member can appear across the product as a bright line, dark patch or distorted reflection. The challenge is not to remove every reflection. It is to design reflections that describe the product clearly, protect the brand’s intended finish and remain consistent across a complete catalogue. For brands in Dubai and across the UAE, this matters in ecommerce, advertising and marketplace content. A product may be technically sharp yet still look inexpensive, uneven or inaccurate if the reflective surfaces are not controlled.
The Short Answer
Reflective products are difficult to photograph because the camera records both the product and everything reflected by it. Professional results depend on controlling the size, shape, position and brightness of reflected light; separating useful highlights from unwanted reflections; and combining careful capture with realistic retouching. The exact solution changes with the material, curvature, colour and intended final image.
What You Will Learn
- Why reflective surfaces behave differently from matte products
- How large light sources, flags and diffusion shape reflections
- Why curved metal, glass and screens require different approaches
- What can be solved during capture and what belongs in retouching
- How brands should prepare reflective products and approve a repeatable visual standard
A Reflection Is Part of the Product Image
With a matte object, light is scattered in many directions. The camera records gradual brightness and colour changes across the surface. A glossy surface behaves more like a mirror: it reflects specific parts of the environment. This means the visible highlight is often not light falling directly on the product. It is the reflection of a diffuser, softbox or illuminated panel. A dark edge may be a black flag deliberately positioned outside the frame. The camera, ceiling and photographer can also appear if the geometry is not controlled. The production team therefore lights the environment that the product sees. The position and size of every reflected surface must be considered from the camera angle.
Why Small Lights Often Create Harsh Results
A small source creates a small, hard reflection. On polished metal, that reflection may look like a bright dot surrounded by a surface that is too dark to describe. Moving the light changes the dot but does not necessarily reveal the product’s form. Large diffused sources create broader transitions. A tall diffusion panel can produce a long controlled highlight on a bottle, appliance or watch case. The apparent size of the source from the product’s position matters more than the physical size alone. Moving a panel closer makes its reflection larger and softer. Moving it farther away reduces its apparent size and changes the transition. These adjustments can be very small because reflective products respond immediately to geometry. The objective is not universal softness. A luxury watch may need precise lines that emphasise the case construction, while a glass bottle may need broad gradients that reveal volume and transparency. The lighting must follow the product design.
Curved Surfaces Magnify the Difficulty
Flat reflective surfaces usually show a relatively predictable area of the studio. Curved surfaces collect reflections from many directions and compress them into the camera view. A cylindrical perfume cap may reflect the full studio in a narrow band. A convex watch crystal may show the camera even when it appears far outside the expected reflection angle. Rounded jewellery can combine several bright and dark zones within a few millimetres. Because curvature changes across the object, one light position may work for one area and fail elsewhere. The photographer may capture several controlled exposures and combine them in post-production, provided the product and camera remain fixed. This is not a shortcut for poor lighting. Each exposure still needs an intentional reflection pattern and accurate alignment.

Polished Metal Needs Both Bright and Dark Information
Metal is often photographed with a combination of white reflected panels and dark flags. The bright areas reveal finish and shape; darker lines separate edges and prevent the surface from becoming a featureless white mass. Silver, chrome and gold require different colour handling. A warm environment can contaminate silver. Excessively neutral correction can remove the character of gold. Brushed metal needs enough directional light to show texture without turning every microscopic mark into a distraction. The correct balance also depends on the intended impression. Jewellery may need brilliant contrast and gemstone separation. An industrial component may need a more neutral, technically descriptive result. A cosmetics package may prioritise clean branding and a premium gradient. The important point is that dark reflections are not automatically mistakes. Carefully placed dark information can make reflective products readable.
Transparent and Reflective Materials Interact
Perfume bottles, beverage containers and glossy packaging may combine reflection, transparency and refraction. Light passes through the object, bends at its surfaces and reflects from the front and rear edges. A bottle that looks clear to the eye can become grey against the wrong background. Its edge may disappear, the liquid colour may shift, or the label may lose contrast. Lighting the background independently is often necessary. Glass edges can be defined with bright-field or dark-field approaches. In one, the background is bright and the edges become darker. In the other, the background is dark and carefully positioned bright edges describe the glass. Neither approach is automatically superior; the brand design and required background determine the choice. Labels and caps may need separate attention. A transparent bottle can be beautifully defined while a metallic cap shows unwanted reflections, so the complete product must be evaluated as several connected materials.
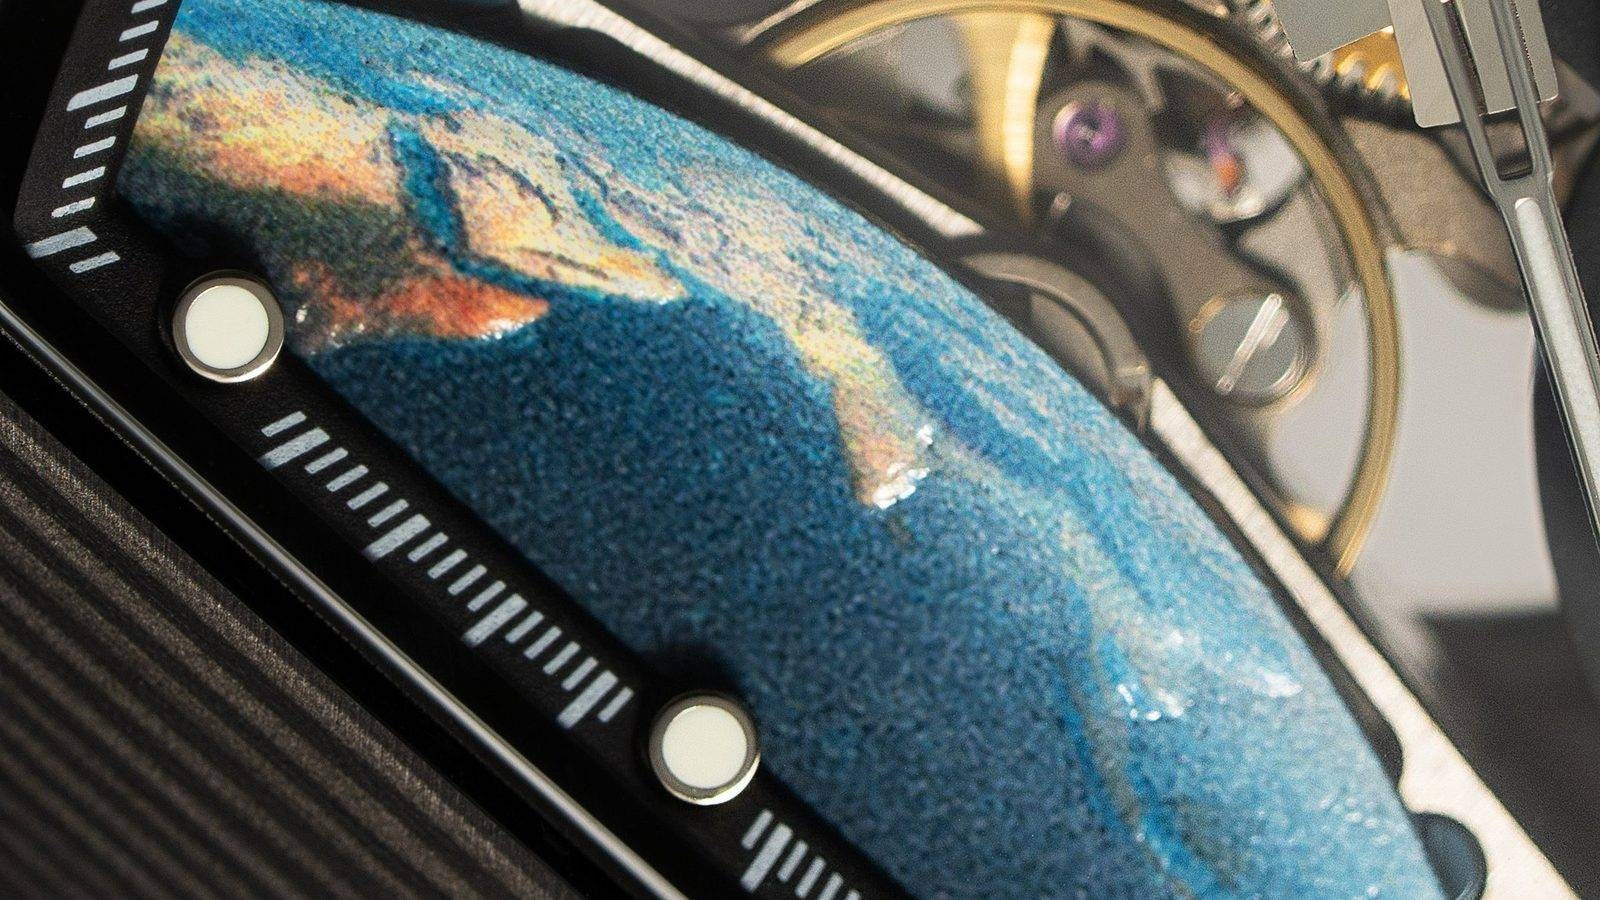
Watches Create Several Problems at Once
A watch may include polished and brushed metal, a curved crystal, a textured dial, reflective hands, luminous markers, gemstones and a strap with its own surface behaviour. Showing the dial clearly can create an unwanted reflection in the crystal. Lighting the case dramatically can make the hands or indices disappear. A dark dial may require a controlled reflection to reveal its colour and texture rather than appearing black. Watch hands are often positioned deliberately before capture. The crown, bezel, bracelet and clasp are cleaned and aligned. Camera angle influences the apparent symmetry and case thickness. Focus stacking may be used when the required perspective exceeds the available depth of field. A strong image should preserve the real construction while making each important feature understandable. Removing all crystal reflection can make the watch look physically unrealistic; allowing an uncontrolled reflection can hide the dial.
Jewellery Requires Precision at a Smaller Scale
Jewellery introduces tiny reflective surfaces and high contrast between metals, stones and background. Gemstones need light that reveals cut and internal brilliance, while polished metal requires clean gradients and defined edges. Dust, fingerprints and micro-scratches become significant at close range. Some imperfections should be cleaned before capture, while appropriate finishing marks should remain so the material does not look artificial. Depth of field is also limited in macro photography. Focus stacking may be necessary, but the product must remain completely still and every frame must align. Gemstone sparkle can change between exposures, so stacking and compositing require careful judgement.
Screen Products and Electronics
Phones, tablets, watches and appliances often combine black glass, polished frames and active displays. A black screen behaves like a mirror and can reveal the complete set. Turning on the display creates another exposure problem because the screen and physical product may need different brightness levels. The screen can be captured in camera, composited from an approved interface file or created through a combination of both. The method should be agreed in the brief, especially when the displayed content is regulated, localised or subject to later changes. Fingerprints, dust and protective films must be removed before capture. Edge lighting should describe the black glass without creating a distracting white stripe across the content.

Control Begins With Camera Position
Lighting should not be planned before the final camera angle is established. Changing the camera changes every reflection relationship. The photographer first confirms perspective, focal length, product rotation and crop. The team then builds reflection control around that view. Once the setup is approved, the camera and product should remain locked. A small product rotation may change a logo, bevel or polished edge significantly. For catalogue production, repeatable supports, measurement marks and product guides help maintain consistency across SKUs.
Polarising Filters Help, but They Are Not Magic
A polarising filter can reduce certain reflections on glass, paint and non-metallic surfaces. Cross-polarisation, using polarising material on the lights and a filter on the lens, can suppress more glare in specialised setups. However, polarisation does not remove direct reflections from metallic surfaces in the same way. It also reduces light, may affect colour and can make a product look unnaturally flat if every highlight is eliminated. The filter is one tool within a broader lighting system. It should be used when it improves product information, not as an automatic solution for every shiny object.
Product Preparation Has a Direct Effect on Retouching
Reflective surfaces should arrive as clean and camera-ready as possible. Retouching is slower and less reliable when it must reconstruct details hidden by fingerprints, adhesive residue, scratched protective film or damaged packaging. Before delivery, check:
- Fingerprints and handling marks
- Dust around bezels, caps, hinges and seams
- Adhesive residue and protective films
- Scratches, dents and inconsistent finishes
- Labels, logos and printed elements
- Moving parts, watch hands and display settings
- Duplicate samples for high-priority products
Products should be transported in protective packaging and handled with gloves or clean tools on set. Cleaning materials must suit the surface; the wrong cloth can add fine scratches to polished plastic or metal.
Capture vs Retouching
The best workflow solves major reflection problems during capture and uses retouching for refinement. Post-production can remove dust, minor scratches, visible equipment, support elements and small inconsistencies. It can combine separately lit exposures and perfect edge transitions. Retouching should not be expected to invent a convincing material from a poorly recorded surface. Rebuilding a watch case, glass bottle or chrome appliance digitally can take longer than photographing it correctly and may introduce inaccurate geometry. Before production, agree which marks are defects and which are authentic material characteristics. Over-retouching can erase brushed texture, make glass edges impossible or turn jewellery into a computer-generated object.
Why One Product May Need Multiple Exposures
Complex objects are often built from a controlled set of captures. One exposure may optimise the label, another the cap, another the glass edge and another the background or shadow. The product, camera and focus must remain stable. Lighting changes are documented, and the editor receives a clear plan. The combined image should still represent one believable lighting environment. This method is particularly useful when different materials require incompatible reflection patterns. It should not create conflicting highlights or multiple shadows that reveal the composite.
Maintaining Consistency Across a Catalogue
A single hero image can support a highly customised lighting treatment. A catalogue requires a repeatable system. Approve a representative test product before photographing the full range. Record:
- Camera height, angle and focal length
- Product position and rotation
- Key diffusion and flag positions
- Background and shadow treatment
- Crop and product scale
- Colour reference and retouching level
- File naming and deliverables
Variations in product shape may still require adjustments, but the visual rules should remain stable. Consistent reflection width, edge contrast and background value help the range look like one brand rather than separate shoots.
What Affects Production Time
Reflective-product production is influenced by more than SKU count. Important factors include:
- Number and complexity of materials
- Curvature and surface finish
- Required angles and detail views
- Condition of the samples
- Need for focus stacking or exposure compositing
- Background and prop complexity
- Colour accuracy and approvals
- Retouching expectations
- Consistency across product variations
A quote should describe the desired images and workflow rather than promising an unrealistic number of reflective products per hour. Test photography is often the most reliable way to define a repeatable production estimate.
How to Brief a Reflective Product Shoot
Include:
- Product list and final SKUs
- Intended use and platforms
- Required angles and crops
- References for lighting and finish
- Priority features that must remain visible
- Accurate colour references
- Known sample defects
- Retouching boundaries
- Delivery formats and deadlines
Identify whether the goal is a technically clean ecommerce catalogue, a premium advertising image or both. The same reflective product may require very different lighting for those uses.
Common Mistakes
Trying to Remove Every Reflection
Without reflections, glossy materials lose shape and no longer look physically convincing.
Changing the Camera After Lighting
A new camera angle changes the reflected environment and can invalidate the complete setup.
Using a Small Softbox Too Far Away
The source may still appear small and create a harsh isolated highlight.
Ignoring the Background
Transparent and glossy objects interact strongly with the colour and brightness behind them.
Relying on Retouching to Fix Poor Capture
Post-production cannot always recover hidden logos, lost texture or inaccurate shape.
Skipping a Catalogue Test
Small inconsistencies become obvious when many products appear together.
Frequently Asked Questions
Can reflections be removed completely from product photography?
They can often be reduced or redesigned, but complete removal is rarely desirable. Controlled reflections reveal shape, gloss and material. The goal is to eliminate distracting reflections while preserving believable surface information.
Why do black glossy products look grey in photographs?
A black surface reflects the light sources and studio around it. Broad bright reflections can make it appear grey. Carefully shaped highlights and dark flags help retain black while revealing form.
Does a polarising filter work on metal?
It can affect some indirect glare in the scene, but it does not remove direct reflections from metallic surfaces in the same way it can on glass, paint or plastic.
Why is reflective product retouching more complex?
Dust, scratches, gradients and reflected edges must be cleaned without damaging real texture or geometry. Complex images may also combine several separately lit exposures.
Should brands provide more than one sample?
A backup is useful for priority items, fragile packaging and products likely to show handling marks. The cleaner, more consistent sample can be selected for the final image.
Can reflective products be photographed on location?
Yes, but the environment must be controlled. A studio usually offers greater flexibility for diffusion, flags, camera locking and repeated catalogue setups.
Conclusion
Reflective products are difficult because they show both their own design and the production environment around them. Successful photography depends on treating reflections as part of the image rather than as defects to be removed. Large diffused sources, precisely positioned flags, a locked camera, careful sample preparation and a defined retouching plan allow metal, glass, screens and glossy packaging to look accurate and premium. The solution must follow the product’s material and intended use. For a brand, the most useful starting point is a clear brief and an approved representative test. Once the reflection language, crop, colour and retouching level are agreed, the production can remain consistent across a wider catalogue.
Blog


AI Content vs Traditional Photography and Video: What Should Your Brand Use?

How to Prepare Product References for AI Content Production

How Many Product Images Does an Ecommerce Product Page Need?

What Affects the Cost of Professional Live Streaming in Dubai?

How to Plan Photography and Video for a New Fashion Collection

How Product Photography Pricing Is Calculated

What Should Be Included in a Video Podcast Production Quote?


How Many Short Videos Can You Create From One Video Podcast?

Ecommerce Fashion Photography vs Campaign Photography

Product Photography vs Product Videography: What Does Your Brand Need?

How to Prepare Clothing for an Ecommerce Fashion Photoshoot

White Background vs Lifestyle Product Photography